A while ago, at my first attempt at relearning the piano as an adult I wired my Roland FP-10 up to a Raspberry Pi. I started trying to figure out what the devil MIDI was, then decided I wanted to record practice sessions
Piano -> Raspberry Pi -> something I don’t mind listening too worked reasonably well, but there were usability quirks. I figured out how to trim the leading and trailing silence and that made it massively nicer to use. The next big hurdle was that I’m bad at the piano, so it takes ages to get a satisfactory play through, meaning I’m running back and forth starting and stopping recordings. I’d SSH to the pi, run arecordmidi, play, kill the recording, then repeat.
My first thought was to wire a couple buttons I had lying around into a panel I attached to the piano, then interact with the Raspberry Pi through that. Start and stop without leaving the piano would be a massive win. Then it occurred to me that a piano is like… dozens of buttons. Why go adding more?
The only real quirk was no feedback. With a button I could also turn on an LED or even get one of those cheep arcade buttons with the LED in them. Without the button, how would I interact? Around about then I learned a digital piano’s MIDI is bidirectional. I had set it up so the Pi was recording the notes I played, but it was basically the same amount of work to have the Pi make the piano play notes.
Thus this utility was born
What it does
Hold the lowest key (A0) for 3 seconds -> Pi makes the piano play an ascending 3 note acknowledgement chime -> Pi starts recording
Hold the lowest key (A0) for 3 seconds -> Pi makes the piano play a descending 3 note acknowledgement chime -> Pi stops recording
The second press of A0 is buffered and not written to the file unless if it matches the expected format. This tiny little bit of functionality got me ~95% of the way to where I wanted to be – easy starting/stopping of recordings from the piano. After a bit of use I found the one thing I wanted just for my own sanity was a “forget it, that last take was trash”. I very often psyche myself out when I know I’m recording, so the first (and maybe second and third) tries are immediate failures, which lead to…
Hold the highest key for 3 seconds -> Pi makes a low descending acknowledgement chime -> Pi deletes the most recent recording
Deployment
The whole thing runs as a systemd service that comes up at boot and reconnects on its own when the piano is powered off and on again (which I do constantly). This means that so long as the Raspberry Pi is powered and the SD card hasn’t been corrupted, I basically never need to interact with it.
So far this has been completely rock solid. Power outages, power cycling the piano multiple times a day, leaving it on, nothing seems to cause any issues.
Listening back
The one remaining quirk is turning the MIDI back into audio. My amateur plinking and plonking deserves nothing short of the full Salamander Grand Piano soundfont, but it’s huge and the Pi just can’t handle it. I rsync the MIDI files to my desktop when I care to and renders them to FLAC (for the true audiophile experience) and MP3 (for sharing).
Now all that’s left to do is learn how to play better.
The logical sequel to trimming silence from a MIDI file, I hit the same problem from the other side – the amount of time between when I stop playing and when I stop the MIDI recording. As expected, this is also extremely straightforward.
MIDI files have a mandatory “end of track” meta event, and it has a time delta just like everything else. So, my Rust code just has to find the end of track event, strip the delta, and profit!
let end_of_track = track.iter().rposition(|event| {
	if let TrackEventKind::Meta {
		0: MetaMessage::EndOfTrack { .. },
		..
	} = &event.kind
	{
		return true;
	}
	false
});

let trimmed_track = match end_of_track {
	Some(index) => {
		trimmed_track[index].delta = 0.into();
		trimmed_track
	}
	None => trimmed_track,
};

...
I recently wrote about recording an Android piano keyboard app’s output to a MIDI file here. I shared a slight annoyance I encountered – the inevitable noticeable delay between hitting the record button and the actual start of the music. The result? A MIDI file with an unwelcome silence before any notes are played. Notes are often less boring to listen to, so it’d be nice to skip this silence.
Turns out the naive solution for single-track MIDI files is incredibly simple! With a solid 5 minutes of reading the MIDI file specifications, I discovered a straightforward fix for single-track MIDI files. I stumbled upon Midly, a Rust library that describes itself as a “feature-complete MIDI decoder and encoder designed for efficiency and ease of use.” With a change of a single byte in the file, we can remove all the silence preceding the first note.
The code
To remove all the silence preceding the first note in a MIDI file, find the first note and changes it’s delta from whatever non-0 value it is to 0. The guts of the (tiny amount of) code look like:
let mut smf = Smf::parse(&buffer)?; let track = smf.tracks.first_mut().unwrap(); let first_note = track.iter().position(|event| { if let TrackEventKind::Midi { message: MidiMessage::NoteOn { .. }, .. } = &event.kind { return true; } false });
let trimmed_smf = Smf { header: smf.header, tracks: vec![trimmed_track.to_vec()], };
As a bit of a noob, I’m not 100% sold on “if let” statements in Rust, but otherwise this code is super straightforward. Find the first note, set its “delta” (time from the previous note) to 0, write the file back out.
I’ve uploaded the code here, so you can give it a whirl and eliminate the silence in your own recordings. Feel free to share your experiences or suggest improvements.
Open questions…
This also suggests some straightforward-ish answers to a few of the previous open questions I had. For example, how can I automatically split MIDI files into songs? Look for large delta values and slice the file there!
I’m new to piano and brand new to digital instruments in general. I want to start trying to learn piano, and I thought “wouldn’t it be nice to archive all my practice so I could listen back over time”. Turns out I don’t know anything about anything involved.
The biggest realization was that MIDI is not an audio format. MIDI records the messages and information about their notes and not the specific sounds, but it is only the set of instructions. A MIDI file needs to be combined with sounds (e.g. sampled from recorded audio) to produce listen-to-able output.
One side of the equation might be someone with a fancy microphone and a real life fancy acoustic piano meticulously recording every note to produce a “sound bank”. This is then combined with the MIDI file, as the MIDI file contains the “how” and “when” for the end audio, and the sound bank contributes the “what”.
Tools
MIDI output device – I don’t yet have a piano, so using an Android app (MIDI Keyboard) as a placeholder
MIDI input device – this needs to be on whenever the piano is on, so feels a bit lame to use a laptop or a keyboard. I have a Raspberry Pi 4 (or rather I have roughly a million Raspberry Pis, but only need one for this), so going to use that for the time being
Cable for connecting MIDI output device to MIDI input device – USB-C on my Android phone to USB micro B on my Raspberry Pi. It seems like Bluetooth is also an option, but this is complicated enough without involving Bluetooth for now..
Software to accept an incoming MIDI stream (snd-virmidi maybe?)
Software to record an incoming MIDI stream to a file (arecordmidi)
Software to combine the MIDI file + sound bank to produce something someone could listen to (FluidSynth)
Record a MIDI file
Install MIDI-outputting app on the Android phone
Ensure the app is configured to actually output MIDI (as opposed to just playing sounds on your device)
With USB, connect Android phone to Raspberry Pi
Ensure the Android phone is set up to be a MIDI device
On the Raspberry Pi, install alsa-utils (sudo apt install alsa-utils)
(not sure if this is necessary or not, but…) Load the kernel module that will be used to receive the MIDI data (sudo modprobe snd-virmidi)
List all the relevant audio input ports to find the Android device, e.g.:
sanity check that MIDI is making it from your phone to the Pi by listening to MIDI data and playing notes
$ aseqdump -p 32:0
Waiting for data. Press Ctrl+C to end.
Source  Event                  Ch  Data
 32:0   Note on                 0, note 54, velocity 100
 32:0   Note off                0, note 54, velocity 100
 32:0   Note on                 0, note 56, velocity 100
 32:0   Note off                0, note 56, velocity 100
 32:0   Note on                 0, note 58, velocity 100
 32:0   Note off                0, note 58, velocity 100
 32:0   Note on                 0, note 61, velocity 100
 32:0   Note off                0, note 61, velocity 100
 32:0   Note on                 0, note 61, velocity 100
 32:0   Note off                0, note 61, velocity 100
^C
start recording MIDI data ($ arecordmidi -p 32:0 example.mid)
play anything on the device
stop recording MIDI data (hit ctrl + c to kill the recording)
At this point there should be a file (example.mid) that contains the “instructions” to reproduce what you just played. Depending on how speedy you were, there might be a lot of silence before and after the notes, but that’s a problem for another day.
Combine MIDI and sound bank to produce sounds
With a MIDI file we’re most of the way home. At this point you can’t listen back to the recording or share it with other people though, as there are no sounds associated with the instructions captured in the MIDI file.
Of note is that the sound bank can be anything – a glorious recording of a real concert piano, pitch shifted farts, or anything else under the sun. MIDI + ??? = song
The most straightforward way I’ve found (after literal seconds of looking) to get sounds out of a MIDI file is with FluidSynth. If it’s not already installed, easy to install with sudo apt install fluidsynth. It appears to ship with some default sound banks, so easiest to start with one of those (/usr/share/sounds/sf2/FluidR3_GM.sf2):
$ fluidsynth -a alsa -o audio.alsa.device=hw:0 -g 1.0 /usr/share/sounds/sf2/FluidR3_GM.sf2 example.mid -F example.wav
FluidSynth runtime version 2.3.1
Copyright (C) 2000-2022 Peter Hanappe and others.
Distributed under the LGPL license.
SoundFont(R) is a registered trademark of Creative Technology Ltd.

Rendering audio to file 'example.wav'..
And tada! Play example.wav with whatever software you’d like! Relatively speaking the file will be huge, so likely makes sense to compress it into an MP3 or similar (e.g. with lame example.wav example.mp3). For my nonsense test data the MIDI file is 258 bytes, the WAV file is 1.9 MB and the MP3 is 175 kB, so there are huge space savings to be had.
Summary
tap away in an Android piano keyboard app
app sends MIDI over USB
Raspberry Pi receives MIDI over USB
arecordmidi saves that stream of MIDI as a MIDI file
FluidSynth combines the MIDI and a sound bank into audio
human celebrates and shares WAV (or MP3) with friends and family, receives accolades
Open questions…
How can I automatically record the audio any time I start playing on the piano?
How can I automatically stop recording the audio when I’m done playing?
How can I trim the audio so I’m not storing silence?
How can I automatically slice an audio stream into discrete recordings so I could get different pieces out of one practice session?
How can I automatically back up my audio recordings in a chronologically organized directory?
How can I find time to play piano when I’m mucking with piano adjacent software and utilities?
A neat thing that Strava premium has is a personal heatmap. It can look something like this:
Strava Global Heatmap
Garmin Connect does not seem to offer a personal heat map at all, only global heat maps. I want my own personal heat map for a number of reasons, but mostly because they’re cool. So… how do I go about that? First, looking for prior art I found this post: https://www.musings.ch/2020/02/24/all-garmin-activities-on-a-map/ which was pretty encouraging that it was at least possible.
Convert activity-containing FIT files to GPX files
I used the fitparser crate to read the data, geo-types to represent each FIT point in an intermediate representation, then the gpx crate to write those to a new GPX file
Plot GPX files on the map with the map provided via Leaflet.js and the GPX drawing provided via leaflet-gpx
Et voilà:
“Heat map”
There are some notable differences from what I originally hoped for with this first pass. The start/end points are rendered as pins, and the “heat” aspect is purely GPS imprecision. Still, I’m thrilled – it’s super cool and I love it. I can also see everywhere I’ve traveled and recorded an activity as well.
The previous post (get OAuth access token) covered retrieving the OAuth access token that can be used for persistent permission to retrieve a shop’s data. To make use of that in the context of an application, we’ll need to attach it to a request. There are a lot of small supporting pieces here, so you’ll need a bit of patience.
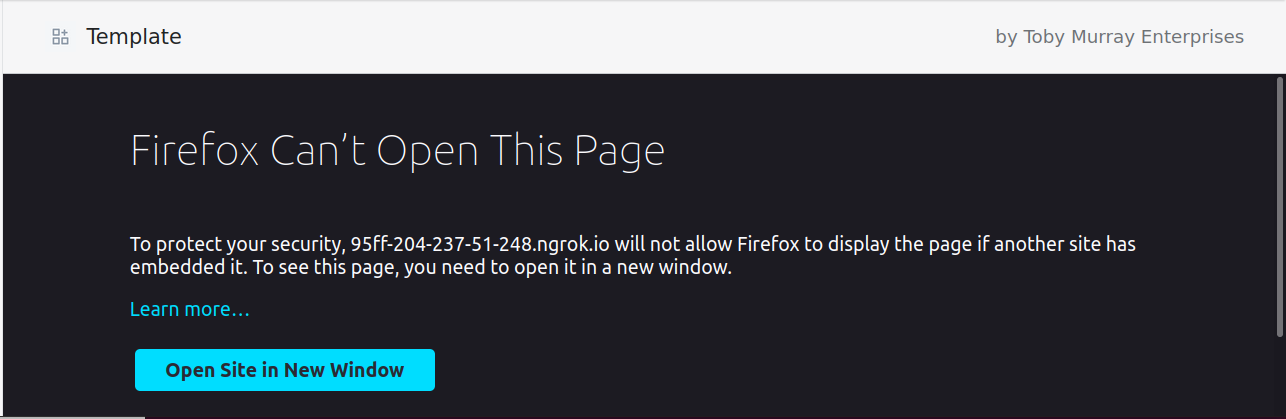
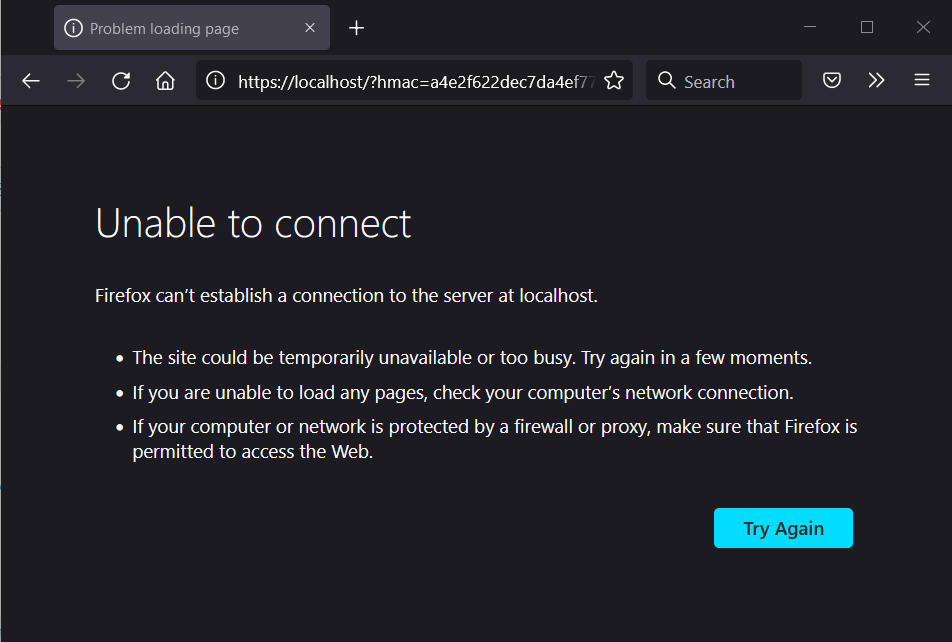
First things first, if you’re actually coding along then when you open the application within Shopify’s dashboard, you’re likely seeing something disappointingly like:
Firefox can’t open this page
This is a security feature that is enabled by Rocket by default that prevents our application from being embedded within another webpage (e.g. the Shopify partner dashboard). Specifically, this is the Rocket shield. There are still some pieces of Rocket that are unimplemented, e.g. support for Content-Security-Policy, so let’s disable some protection entirely to make it embeddable!
With the X-Frame-Options header removed (via Frame), the page should now be embeddable within the Shopify portal (not that we have much to show…).
Making a really good and not at all terrible UI
Aligned with the theme of this series, lets just barrel forwards naively and fix stuff when it doesn’t work. Any self respecting application needs some form of UI, so far we’re lacking that regard. Rather than add that logic in our /install or /callback request handlers, lets add a new API. As these blog posts are not about UI technologies, we’re going to do about the laziest possible thing and return static HTML directly with no supporting tooling. We’ll spice it up just a tiny bit by making it parameterizable with the shop’s name:
// main.rs

fn build_index_html(shop: &str) -> String {
	format!(
		r#"<!DOCTYPE html>
<html lang="en">
<head>
  <meta charset="utf-8">
  <title>R'al cool Shopify app</title>
  <script>
    function doFancyFrontEndThings() {{
      window.alert("Ya dun clicked the button");
    }}
  </script>
</head>
<body>
  <h1>Welcome to this Shopify Application, {}</h1>
  <button onclick="doFancyFrontEndThings()">Click me!</button>
</body>
</html>"#,
		shop,
	)
}
Add a new route that returns this page so that we can see our really rockin’ UI:
Now if we visit the app again we should actually be able to see HTML, which is dramatically cooler than the terribleness we had previously:
Glorious rendered HTML!
Feels like we’re getting close… an installable application with a UI?! The big piece that’s missing is getting Shopify data.
Authorized request to Shopify
Currently we have the access token for our test shop being printed out into the application server logs (bad practice!), so lets use it. Run the application and save the access token somewhere, we’ll hardcode it shortly. Shopify has a number of different APIs and a mix off REST based and GraphQL based interfaces. For some extra complexity, there’s not feature parity between the two. In general, it seems the GraphQL version is intended to be the “future”, so we’ll go down that route. Most APIs relevant for simple apps will come from the Admin API section.
If you’re trying to craft your own query, the Shopify GraphiQL explorer is a great tool to use. If you were doing this for real, you’d likely use a GraphQL client in Rust (e.g. graphql_client), but to keep our dependencies as minimal as possible we’re going to cut some corners. We will add the serde_json crate though, as a halfway between unstructured text and full deserialized structs.
As we’re not trying to tackle “how to work with Shopify’s API in general”, lets use retrieving the shop’s name as placeholder logic. To do so, we’ll need to form a GraqhQL request and submit it to the right endpoint. Well need 4 pieces to build this HTTP POST:
the endpoint: https://{shop}.myshopify.com/admin/api/2021-07/graphql.json
the Content-Type header: Content-Type: application/graphql
the shop’s access token as a header: X-Shopify-Access-Token: {token}
The actual GraphQL query
As with the HTML, make a constant for the very simple GraphQL query. In a real app instead of getting the shop’s name you might get recent orders or customers:
If we traverse this JSON object with wild abandon, we can update our UI so it’s outrageously personalized:
// main.rs
...
	let response_body: serde_json::Value = response
		.json()
		.await
		.map_err(|_| "Error getting response body as json")?;

	let shop_name = &response_body["data"]["shop"]["name"].as_str().unwrap();

	Ok(content::Html(build_index_html(shop_name)))
}
...
Whoa – data from the API in our UI!
Status
Where we started in this post: We had an installable application that would solicit an OAuth access token, but not do anything with it
Where we ended with this post: We tied up a couple loose ends, built a dynamite UI, made a request with the OAuth access token, and served up a UI with data retrieved from Shopify. Things are looking particularly legit around these parts.
Next post: We’ll avoid hard coding the very secret OAuth access token in the browser and store it in memory in Rocket instead
The last post (starting OAuth) tackled the first pass at the app installation API that serves Shopify’s OAuth flow. It also covered declaring the redirect URI, so Shopify sends the application server a web request, the server responds with a redirect to Shopify to authorize the installation, and then Shopify sends the user back to the application server.
A quick refresher on Shopify’s described OAuth flow:
1. The merchant makes a request to install the app. 2. The app redirects to Shopify to load the OAuth grant screen and requests the required scopes. 3. Shopify displays a prompt to the merchant to give authorization to the app, and prompts the merchant to log in if required. 4. The merchant consents to the scopes and is redirected to the redirect_uri. 5. The app makes an access token request to Shopify including the client_id, client_secret, and code. 6. Shopify returns the access token and requested scopes. 7. The app uses the access token to make requests to the Shopify API. 8. Shopify returns the requested data.
We have an authorized request knocking at the door of the application server (/callback API) but we’re not doing anything with it. In this post we’re going to tackle the body of:
The goal here is to address: “The app makes an access token request to Shopify including the client_id, client_secret, and code.” If you take a close look at the output of the previous attempt to install an application, it seems we’ve missed quite a few parameters on the callback API:
Callback API invocation
Specifically on:
GET /callback?code=8a99f98c7deb52660f76219dee5ada50&hmac=6cb4c00bf66110d41cb4d7e26c59ade80d3b322de7ca0f28e54ac9b8dace4f4b&host=dG9ieS10ZXN0LXN0b3JlMi5teXNob3BpZnkuY29tL2FkbWlu&shop=toby-test-store2.myshopify.com&state=random-value×tamp=1639244833 text/html
There are 6 query parameters!
code: The authorization code provided in the redirect, this is what we were after in the previous step and will use in the next step to get a token!
looks like: 8a99f98c7deb52660f76219dee5ada50
hmac: This is a signature we’ll use later to verify the request is unaltered from Shopify, it’s a bit ol’ TO-DO right now though
The timestamp, state, and hmac we can ignore entirely for the time being (this is a development app, we can’t ignore these in production). The host is useful, but not immediately, so let’s ignore it for the time being as well. The code and shop are exactly what we need for the next step. First, let’s make them accessible in our request handler:
Now, what are we ultimately doing with these values? We have a code that represents the Shopify store’s agreement to install the application with the requested permissions. Now that we have that code, we’re going back to Shopify to say “Look, the shop agreed – can we access their data?”. This happens by exchanging the authorization code for an access token. The access token will let us make requests to Shopify that are authorized to access the granting store’s data. Before we dive into that too much, lets actually get an access token.
We need the application server to make a request. To do so, we’ll need an HTTP client. Looking at lib.rs, reqsounds godwest seems like it may be overkill but will likely do the job. We’re using virtually no features of the HTTP client library, and in this case it has to be synchronous regardless of whether the underlying code is sync or async.
Add reqwest to your Cargo.toml:
[package]
name = "template"
version = "0.1.0"
edition = "2021"

[dependencies]
rocket = "0.5.0-rc.1"
reqwest = { version = "0.11" }
Now let’s send an HTTP POST to https://{shop}/admin/oauth/access_token. In the spirit of just doing stuff, let’s give it a shot and see what happens. We’ll ignore Reqwest’s advice to share a client for the time being (another TO-DO?) and go for it. Lets also take the opportunity to change the return type to a Result just because it makes the code a bit easier to work with.
// main.rs
#[rocket::get("/callback?<code>&<shop>")]
pub async fn callback(code: &str, shop: &str) -> Result<&'static str, &'static str> {
println!("The code is: {}", code);
println!("The shop is: {}", shop);
let access_token_uri = format!("https://{}/admin/oauth/access_token", shop);
let client = reqwest::Client::new();
let response = client
.post(access_token_uri)
.send()
.await
.map_err(|_| "Error sending request")?;
println!("Response status: {}", response.status());
let response_body = response
.text()
.await
.map_err(|_| "Error getting response body as text")?;
println!("{}", response_body);
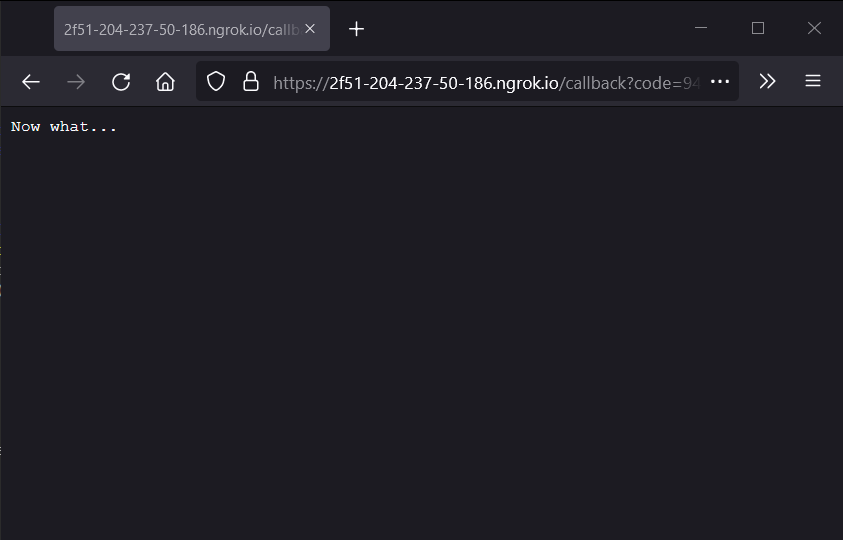
Ok("Now what...")
}
Some good things: the request itself succeeds in sending and a response comes back. Areas for improvement, the request yields an HTTP 400 Bad Request and the body is HTML. If you render the HTML, it looks something like this:
HTTP 400 Bad Request
As it says on Shopify, this is a JSON body with 3 properties:
client_id: this is our application’s API key, coming from the Shopify partner dashboard for the app
client_secret: this is our applications API secret key, also coming from the Shopify partner dashboard for the app
code: this is the code query parameter from the callback URL we have is populated
So, lets grab the values and try again! client_id and client_secret come from the Shopify partner dashboard:
This is where API key and API Secret key are coming from
The code is a query parameter in the original request. We’re crafting a JSON request, and basically as soon as anyone mentions JSON it’s time to add the Serde crate. While we’re there, we’ll enable the json feature of Reqwest so we can use Serde:
[package]
name = "template"
version = "0.1.0"
edition = "2021"

[dependencies]
rocket = "0.5.0-rc.1"
reqwest = { version = "0.11", features = ["json"] }
serde = "1"
One of the easiest ways I’ve found to craft a JSON request is to define a type for the request body and then let Serde serialize it to JSON. Adding the appropriate import and a stuct definition:
Now we can use that and amend our request so it contains the correct body:
#[rocket::get("/callback?<code>&<shop>")]
pub async fn callback(code: &str, shop: &str) -> Result<&'static str, &'static str> {
    let access_token_uri = format!("https://{}/admin/oauth/access_token", shop);

    let body = AccessTokenRequest {
        client_id: "801f137828580f71e33ad6b14f75e533",
        client_secret: "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",
        code,
    };

    let client = reqwest::Client::new();
    let response = client
        .post(access_token_uri)
        .json(&body)
        .send()
        .await
        .map_err(|_| "Error sending request")?;

    println!("Response status: {}", response.status());

    let response_body = response
        .text()
        .await
        .map_err(|_| "Error getting response body as text")?;

    println!("{}", response_body);

    Ok("Now what...")
}
Start up the application server, try installing or opening the app and:
Voilà! An access token!
We have an access token for the shop! As a side note, this is effectively a password that can be used to access a store’s data. Never reveal the value, and be diligent to not let it show up in screenshots in a blog post or similar.
As a quality of life improvement, let’s also deserialize the response body so it’s easier to use. As a quirk of the deserialization, we can only use owned types, so we need String instead of slices:
Once again, referring back to the Shopify OAuth flow we’ve now tackled two more steps:
1. The merchant makes a request to install the app. 2. The app redirects to Shopify to load the OAuth grant screen and requests the required scopes. 3. Shopify displays a prompt to the merchant to give authorization to the app, and prompts the merchant to log in if required. 4. The merchant consents to the scopes and is redirected to the redirect_uri. 5. The app makes an access token request to Shopify including the client_id, client_secret, and code. 6. Shopify returns the access token and requested scopes. 7. The app uses the access token to make requests to the Shopify API. 8. Shopify returns the requested data.
Where we started in this post: We had an app that “installable” and we could both request and be granted permissions for a store installing the app. Unfortunately we could not leverage those permissions to do anything
Where we ended with this post: We’ve exchanged the ephemeral authorization a store grants us for a permanent authorization. In practice this looks like using the provided code value for an OAuth access token. With this token, we can (theoretically at this point) make requests to Shopify for data that belongs to the associated store
Next post: Make an authorized request and obtain a shop’s data!
Previously (the app server) we got to the point where a Shopify store owner could try to install an application, they would make it to our server, our server would do some work, and then the user would get sent to oblivion. Now we’re going to try and correct that, send the user somewhere slightly more useful.
For the time being, we’re going to completely ignore both the HMAC validation and the nonce. They’re important, but for the sake of satisfaction checking things off they can be deferred (can’t go to production without it though). The next step is to show the application permissions prompt. This is pretty straightforward, we just need to collect a handful of values and then redirect the Shopify application:
shop: the name of the shop installing the app, looks something like shop-name.myshopify.com
API key: the API key of the application (not the API secret key), available in the partner portal – looks something like c2ecfe6c6b3745cfaaa9a539b1dfe8a7
scopes: a comma separated list of all of the permissions the app will have. A possible value might be something like: read_products,read_product_listings,read_orders,read_customers
redirect URI: where you want the user to go after everything is said and done, e.g. the landing page for your application
nonce: a random value that can be checked at the next step to ensure the integrity of the process – can be anything, e.g. a UUID works great
access mode: the lifetime of the the token you’ll ultimately get that will allow you to do the things specified in scopes on the user’s behalf. This has to be either per-user or value
Collecting all the values takes a bit, but once you’ve done so the next step is very straightforward. You jam them into a a new URL and this is ultimately what we redirect to:
Implementing this is as straightforward as it seems – amend the previously defined route to redirect somewhere useful:
#[allow(unused_variables)]
#[rocket::get("/install?<hmac>&<shop>&<timestamp>")]
pub fn install(hmac: &str, shop: &str, timestamp: &str) -> Redirect {
    let api_key = "801f137828580f71e33ad6b14f75e533"; // Obviously don't use _MY_ key, swap this out for your own
    let scopes = "read_products,read_product_listings,read_orders,read_customers"; // These will be custom for you depending on your goals
    let nonce = "random-value"; // TODO: This should be unique to each OAuth flow, so hold your nose for a bit...

    let redirect = format!("https://{shop}/admin/oauth/authorize?client_id={client_id}&scope={scopes}&redirect_uri={redirect_uri}&state={nonce}&grant_options[]={access_mode}",
		shop = shop,
		client_id = api_key,
		scopes = scopes,
		redirect_uri = "this-does-not-exist-yet", // Redirecting to oblivion
		nonce = nonce,
		access_mode = "value");

    Redirect::to(redirect)
}
Now, try the install dance again and see what we get!
“The redirect_uri is not whitelisted”
Now isn’t that interesting, we redirected somewhere but something else is going on! We’re one step further and have uncovered a brand new way to screw this up. We redirected the user, but in the very beginning we just filled in the field in our app’s configuration with nonsense. Time to go back and fill in a value that lines up with the app. I used “this-does-not-exist-yet” in the code above, so it’s appropriate to be skeptical this will solve all our problems, but lets see.
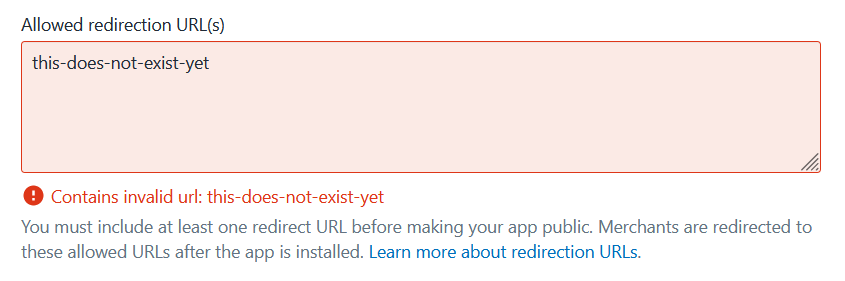
In the partner portal, click on your app and then “App setup”, “find Allowed redirection URL(s)” and add the value we’re redirecting to (“this-does-not-exist-yet”), then save.
Fails validation
Looks like the value we’ve used is too fake to be useful! Update the redirect_uri in the code to something that looks more like a URL (e.g. https://this-does-not-exist-yet.test) and put the corresponding value in the configured “Allowed redirection URL(s)”.
    let redirect = format!("https://{shop}/admin/oauth/authorize?client_id={client_id}&scope={scopes}&redirect_uri={redirect_uri}&state={nonce}&grant_options[]={access_mode}",
		shop = shop,
		client_id = api_key,
		scopes = scopes,
		redirect_uri = "https://this-does-not-exist-yet.test", // <-- This is what changed here
		nonce = nonce,
		access_mode = "value");
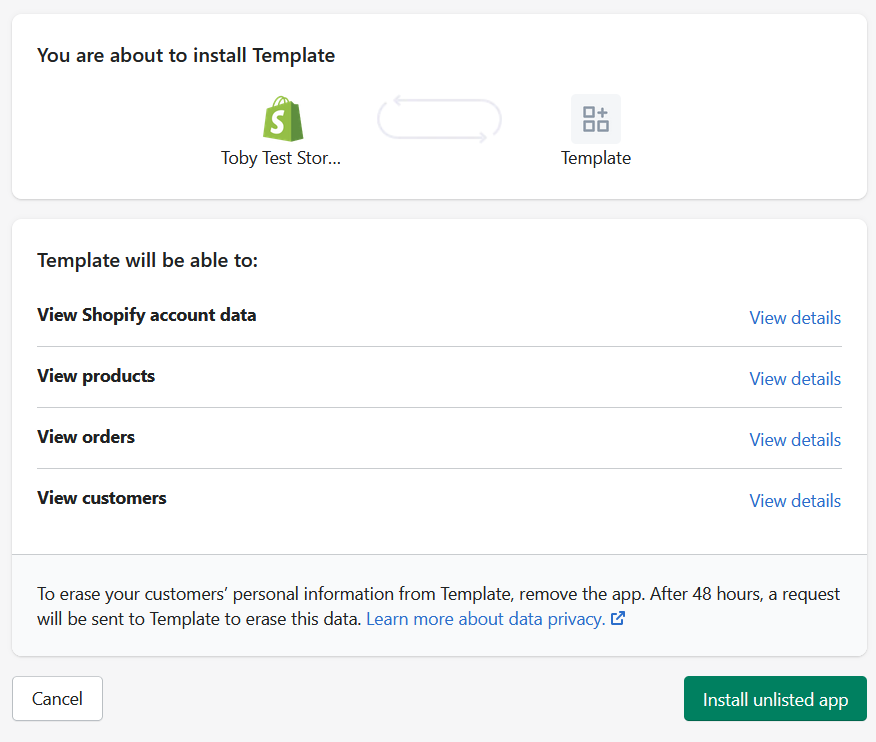
Now restart your server and do the installation dance again:
Made it to the permissions page
We’ve snuck by the validation! We’re so close to having an installable Shopify application, just click that sweet, sweet “Install unlisted app” button and…
We’ve redirected to oblivion again
I have to be honest, I saw this one coming. Obviously the value we used for redirect_uri was a bit less useless. We’ll need our application to have at least one more route, so we can redirect users there at this point. Lets fix this quick:
add a brain-dead API, e.g. I chose (/callback) that will return some static text (just so we have some response)
mount the API
update the redirect_uri in your code so to reflect this new value
re-re-update the “Allowed redirection URL(s)” in your Shopify partner portal’s app configuration to be whatever your real value is for the API we just introduce
For me, the whole URL for this new callback API looks like: https://2f51-204-237-50-186.ngrok.io/callback. Note that because this is using ngrok, every time you re-establish an ngrok connection you’ll have to update this value and keep it in sync between Shopify configuration and your application code, lest you run into the errors we saw above. This means it’s easiest to keep the ngrok application running the whole time you’re developing so you don’t have to go whitelist the address in your “Allowed Redirection URL(s)” field in your Shopify app configuration constantly.
Shockingly enough, at this point when we try again we will technically have installed your application into the store. To test again you can delete it if you’d like, but we’ll end up the same place if you try and reinstall it in the same store, so dealer’s choice.
After making the code and configuration changes, restart the server, reinstall the application, annnnnddd…..
Successful redirection!
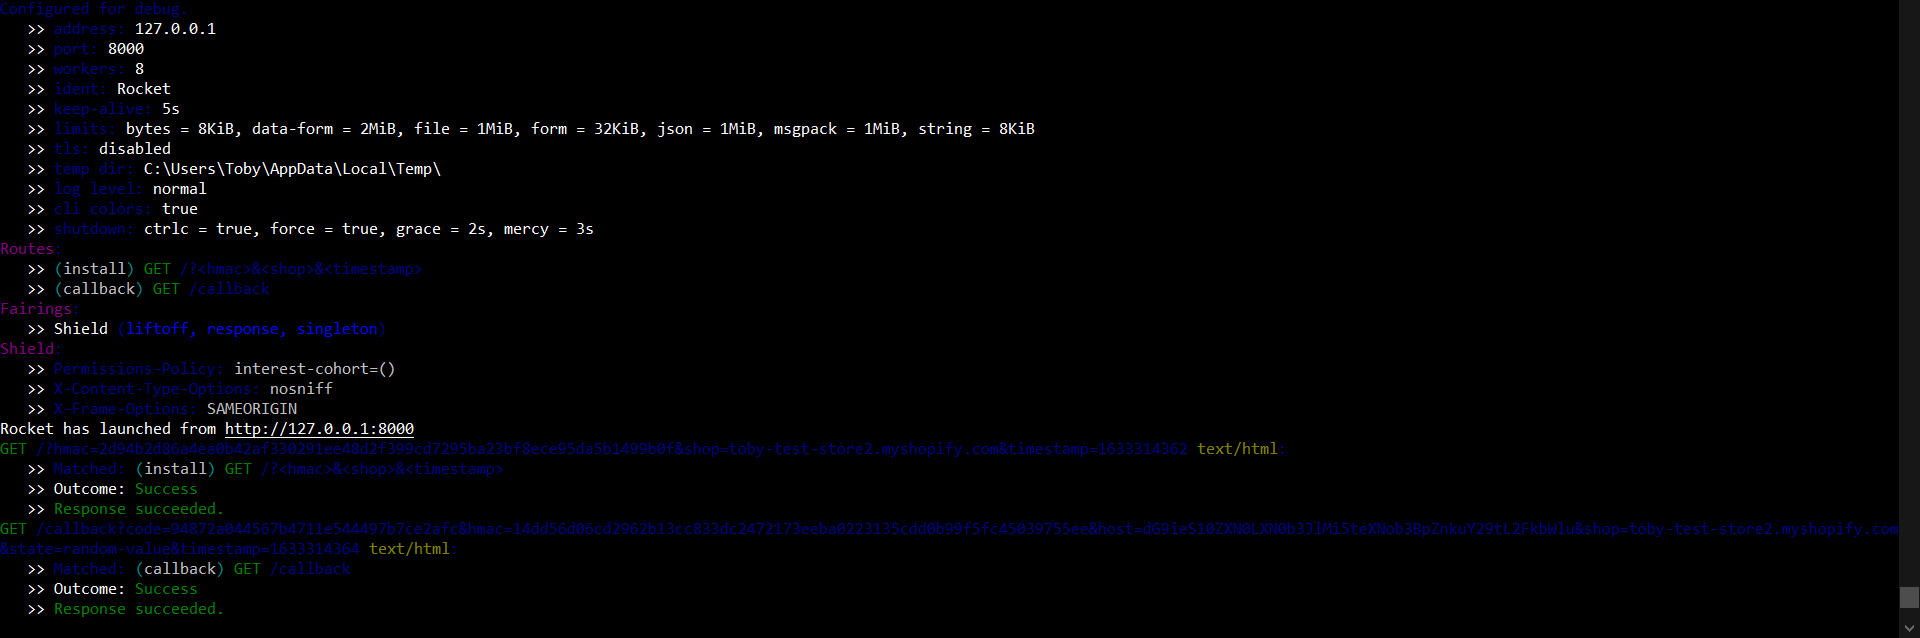
Looking at the terminal:
terminal output
We can see a request to: /callback?code=94872a044567b4711e544497b7ce2afc&hmac=14dd56d06cd2962b13cc833dc2472173eeba0223135cdd0b99f5fc45039755ee&host=dG9ieS10ZXN0LXN0b3JlMi5teXNob3BpZnkuY29tL2FkbWlu&shop=toby-test-store2.myshopify.com&state=random-value×tamp=1633314364
That’s a lot of stuff that we’re currently not doing anything with. Revisiting Shopify’s described OAuth flow:
1. The merchant makes a request to install the app. 2. The app redirects to Shopify to load the OAuth grant screen and requests the required scopes. 3. Shopify displays a prompt to the merchant to give authorization to the app, and prompts the merchant to log in if required. 4. The merchant consents to the scopes and is redirected to the redirect_uri. 5. The app makes an access token request to Shopify including the client_id, client_secret, and code. 6. Shopify returns the access token and requested scopes. 7. The app uses the access token to make requests to the Shopify API. 8. Shopify returns the requested data.
We’re halfway there! We have an installable Shopify app that is a security nightmare, a GDPR liability, exclusively serves up a single static piece of text, and can’t interact with Shopify at all beyond the first stage of installation, but hey – it’s a Shopify app.
Status
Where we started in this post: We had an application server responding (albeit with garbage) to traffic originating from Shopify
Where we ended with this post: By tackling the first few steps of the Shopify OAuth flow, we have an INSTALLABLE Shopify application that can totally be installed in a store and then it’s in the list of installed apps. Also we have some handy looking data showing up at our callback URL
Next post: We complete the OAuth flow (glossing over a couple major TO-DOs) and obtain the credentials we need to make an authenticated request to Shopify on behalf of the store installing the application
In the second post (Connecting Shopify to your computer), I went over getting to the point where Shopify is sending web traffic from their store’s admin UI to your local machine. The devastating shortcoming of the project so far is that it literally does nothing except return a 502 Bad Gateway (and even that is thanks to ngrok), which isn’t a great user experience. The next step is to… build anything at all.
Setting the Shopify configuration aside, I’ve selected the Rocket web framework because… mostly it was a coin flip. I can’t say I’m particularly overjoyed in my experience using Rocket as it’s missing quite a few things I’m used to in other frameworks, but it’s Rust and there’s just not that much on offer yet. I have opted to use the 0.5 release candidate to use stable Rust. Notably, the main developer behind the framework has some not-volunteering-his-life-for-Internet-strangers going on which has hopefully only temporarily stalled Rocket.
Lets build the worst possible Rocket application and see what happens, so here’s some code:
# Cargo.toml

[package]
name = "shopify-template2"
version = "0.1.0"
edition = "2021"

[dependencies]
rocket = "0.5.0-rc.1"
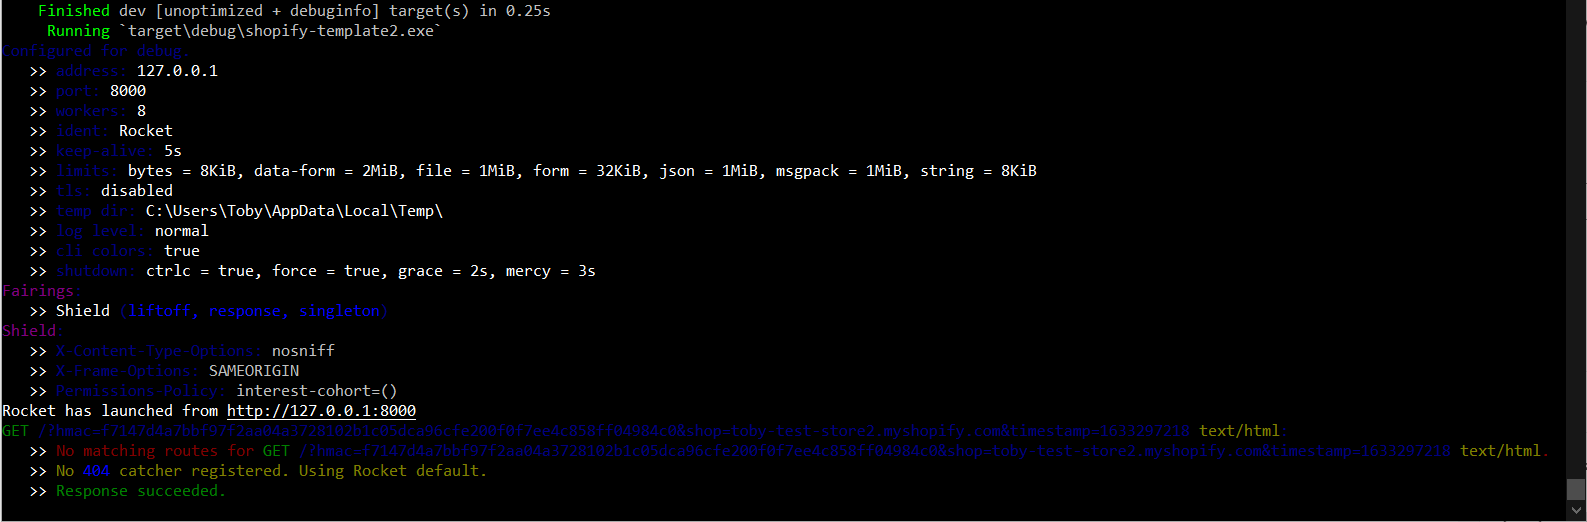
This is the reason for choosing 8000 as the port for ngrok, it’s the default used by Rocket. The the ol’ cargo run (ensuring that ngrok is still binding to 8000) will start a Rocket server. With the server running and ngrok forwarding traffing, going back into Shopify and trying to install the app in a test store again yields yet another new kind of failure – thrilling!
I see “rocket” in that 404, is that coming from _my_ machine?!
And in the terminal, we see the traffic is not just making it from Shopify -> ngrok -> our machine, it’s making it to the application server as well!
Now we’re getting somewhere!
Obviously it’d be surprising if Rocket worked out of the box with Shopify, so this failure is expected. Lets add an HTTP request handler so that we can start building out some functionality. At this point it does nothing but (hopefully) matches the URL Shopify is reaching out to, prints a line to the terminal, and redirects to… well, nowhere right now.
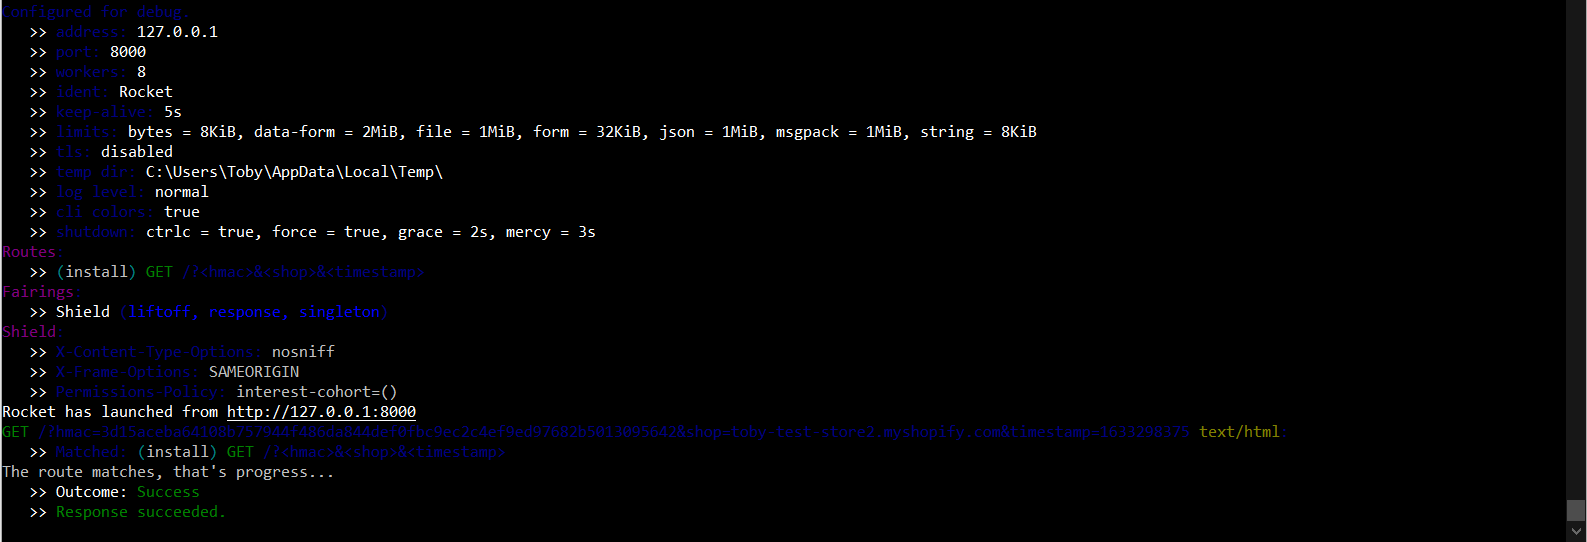
Run the server again, try installing again, lets see what we get now…
Huge success! Installing the Shopify app has actually exercised some logic, a redirect to oblivion!
Confirmed by the server – traffic is coming in, a statement is being logged, a response is being issued. Significantly further than where we started, that’s a good stopping point.
One last step before we move on – for clarity’s sake going forward lets move the App URL from "/?<hmac>&<shop>&<timestamp>" to "/install?<hmac>&<shop>&<timestamp>". This will tidy things up very slightly in the future – remember to update your partner dashboard with the new App URL!
Where we started in this post: we had nothing but some Shopify accounts and some incoming web traffic, abandoned at our doorstep and ignored
Where we ended with this post: Installing the Shopify application executes {{logic}} on our local application server and returns a response, though not a very satisfying one
Next post: Implementing the first few steps of Shopify’s OAuth flow
In the first post (Part 1: The preface), I went over the prerequisites for this Shopify application project. Now we’ll get to some of the more real stuff.
The “App URL” and at least one “Allowed redirection URL(s)” is required, lets use the defaults at this stage – “https://localhost/”. This won’t work, but we’ll find that out soon enough. Now we have a Shopify application! Lets try it out by installing it in our development store.
Test your app
Click through to your development store, aaaannnddd….
1. The merchant makes a request to install the app. 2. The app redirects to Shopify to load the OAuth grant screen and requests the required scopes. 3. Shopify displays a prompt to the merchant to give authorization to the app, and prompts the merchant to log in if required. 4. The merchant consents to the scopes and is redirected to the redirect_uri. 5. The app makes an access token request to Shopify including the client_id, client_secret, and code. 6. Shopify returns the access token and requested scopes. 7. The app uses the access token to make requests to the Shopify API. 8. Shopify returns the requested data.
We’re acting as the merchant here, so step 1 – check, we’re requesting to install the app. The next step, “the app redirects to Shopify” is definitely not happening. Not only is the app not redirecting, it’s not doing so hot on the whole “existing” front either. If you look at the page your browser tries to load, you’ll see something like:
localhost, eh? https://localhost/ looks an awful lot like some corners we cut just moments ago. Navigating back into the app’s screen in the Shopify partner portal, we can open up the “App setup” page and revisit our choice of “App URL” to confirm our suspicions. Update it to a different value (make sure to save!), and try to install again
Same failure, but different
Confirmed – “App URL” is the URL Shopify is using to look for the app (imagine that). So now we just need a real URL… and I guess also an app that’s available at that URL.
Step 2: Obtain a public URL
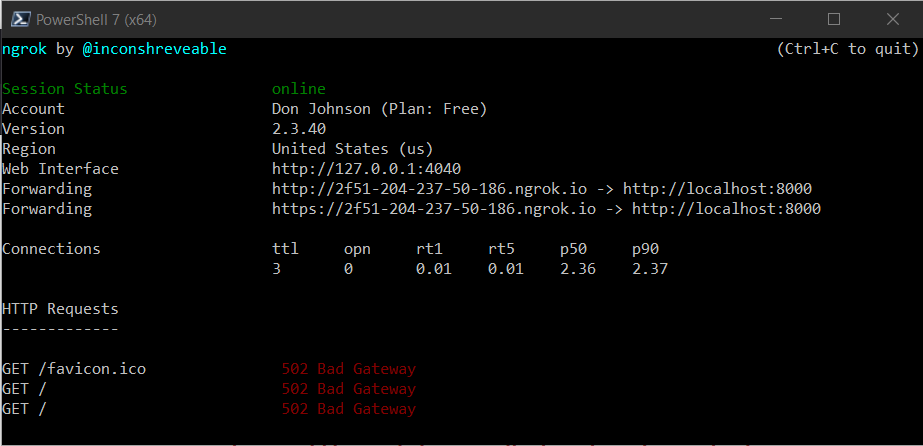
If you have a VM in the cloud, there’s a solid chance you will either have a public IP associated with the VM or be able to purchase one. I tend to use Linode’s 5$ VMs, as they include a static IPv4 address (referral link). During development, something like ngrok is handy for instantly making your local PC accessible from the Internet. Going the ngrok route is pretty straightforward, so lets start there. We’ll use port 8000 for reasons that are vaguely relevant in the future. ngrok http 8000 is all that’s needed:
ngrok exposing port 8000
Would you look at that – ngrok is forwarding a public URL to the local machine. Now we have a public URL! It’s admittedly obscure, but for me (note this will be a dead or random link by the time you read this): https://2f51-204-237-50-186.ngrok.io
Let’s throw that into the Shopify app configuration as the App URL and see what happens. Update the URL, save the configuration, try installing it again aaaaaand:
Slightly different failure!
Now we’re getting somewhere! Traffic is seemingly showing up on our local machine, we’re just not doing anything with it. In ngrok you should similarly see evidence of some traffic:
Ooohhh, Bad Gateway
We have web traffic moving from Shopify -> ngrok -> our local machine, which is pretty solid progress. Unfortunately, nothing is happening with that traffic yet. This leads to a quite obvious next step – setting up a web server to handle this traffic!
Where we started in this post: we had nothing but a dream and a vague roadmap
Where we ended with this post: Installing the Shopify application drives web traffic to our local machine
Next post: Take the web traffic from a Shopify installation request and do anything with it